Create your first project
A KnotCMS project connects a Notion database to a Framer CMS collection. This guide takes you from New project to your first successful sync, whether your content starts in Framer, Notion, or both.
The wizard has four steps. Follow them in order:
| Step | What you do |
|---|---|
| 1. Connect | Connect Notion and enter your Framer site credentials |
| 2. Direction | Choose what to create or connect |
| 3. Fields | Choose or create a Notion database, then map its fields |
| 4. Automation | Set automatic sync and publishing, then create the project |
Before you start
Section titled “Before you start”Have these ready:
- A Google account to sign in to KnotCMS.
- A Framer project with CMS access, its project URL, and a Server API key from that same project.
- Access to the Notion workspace you want to use.
Your content can start in any of these places:
| What you already have | What KnotCMS can do |
|---|---|
| A Framer CMS collection | Create a Notion database from it so you can edit the content in Notion |
| A Notion database and a Framer CMS collection | Connect the two and map their fields |
| A Notion database | Create a new Framer CMS collection for it |
Open a new project
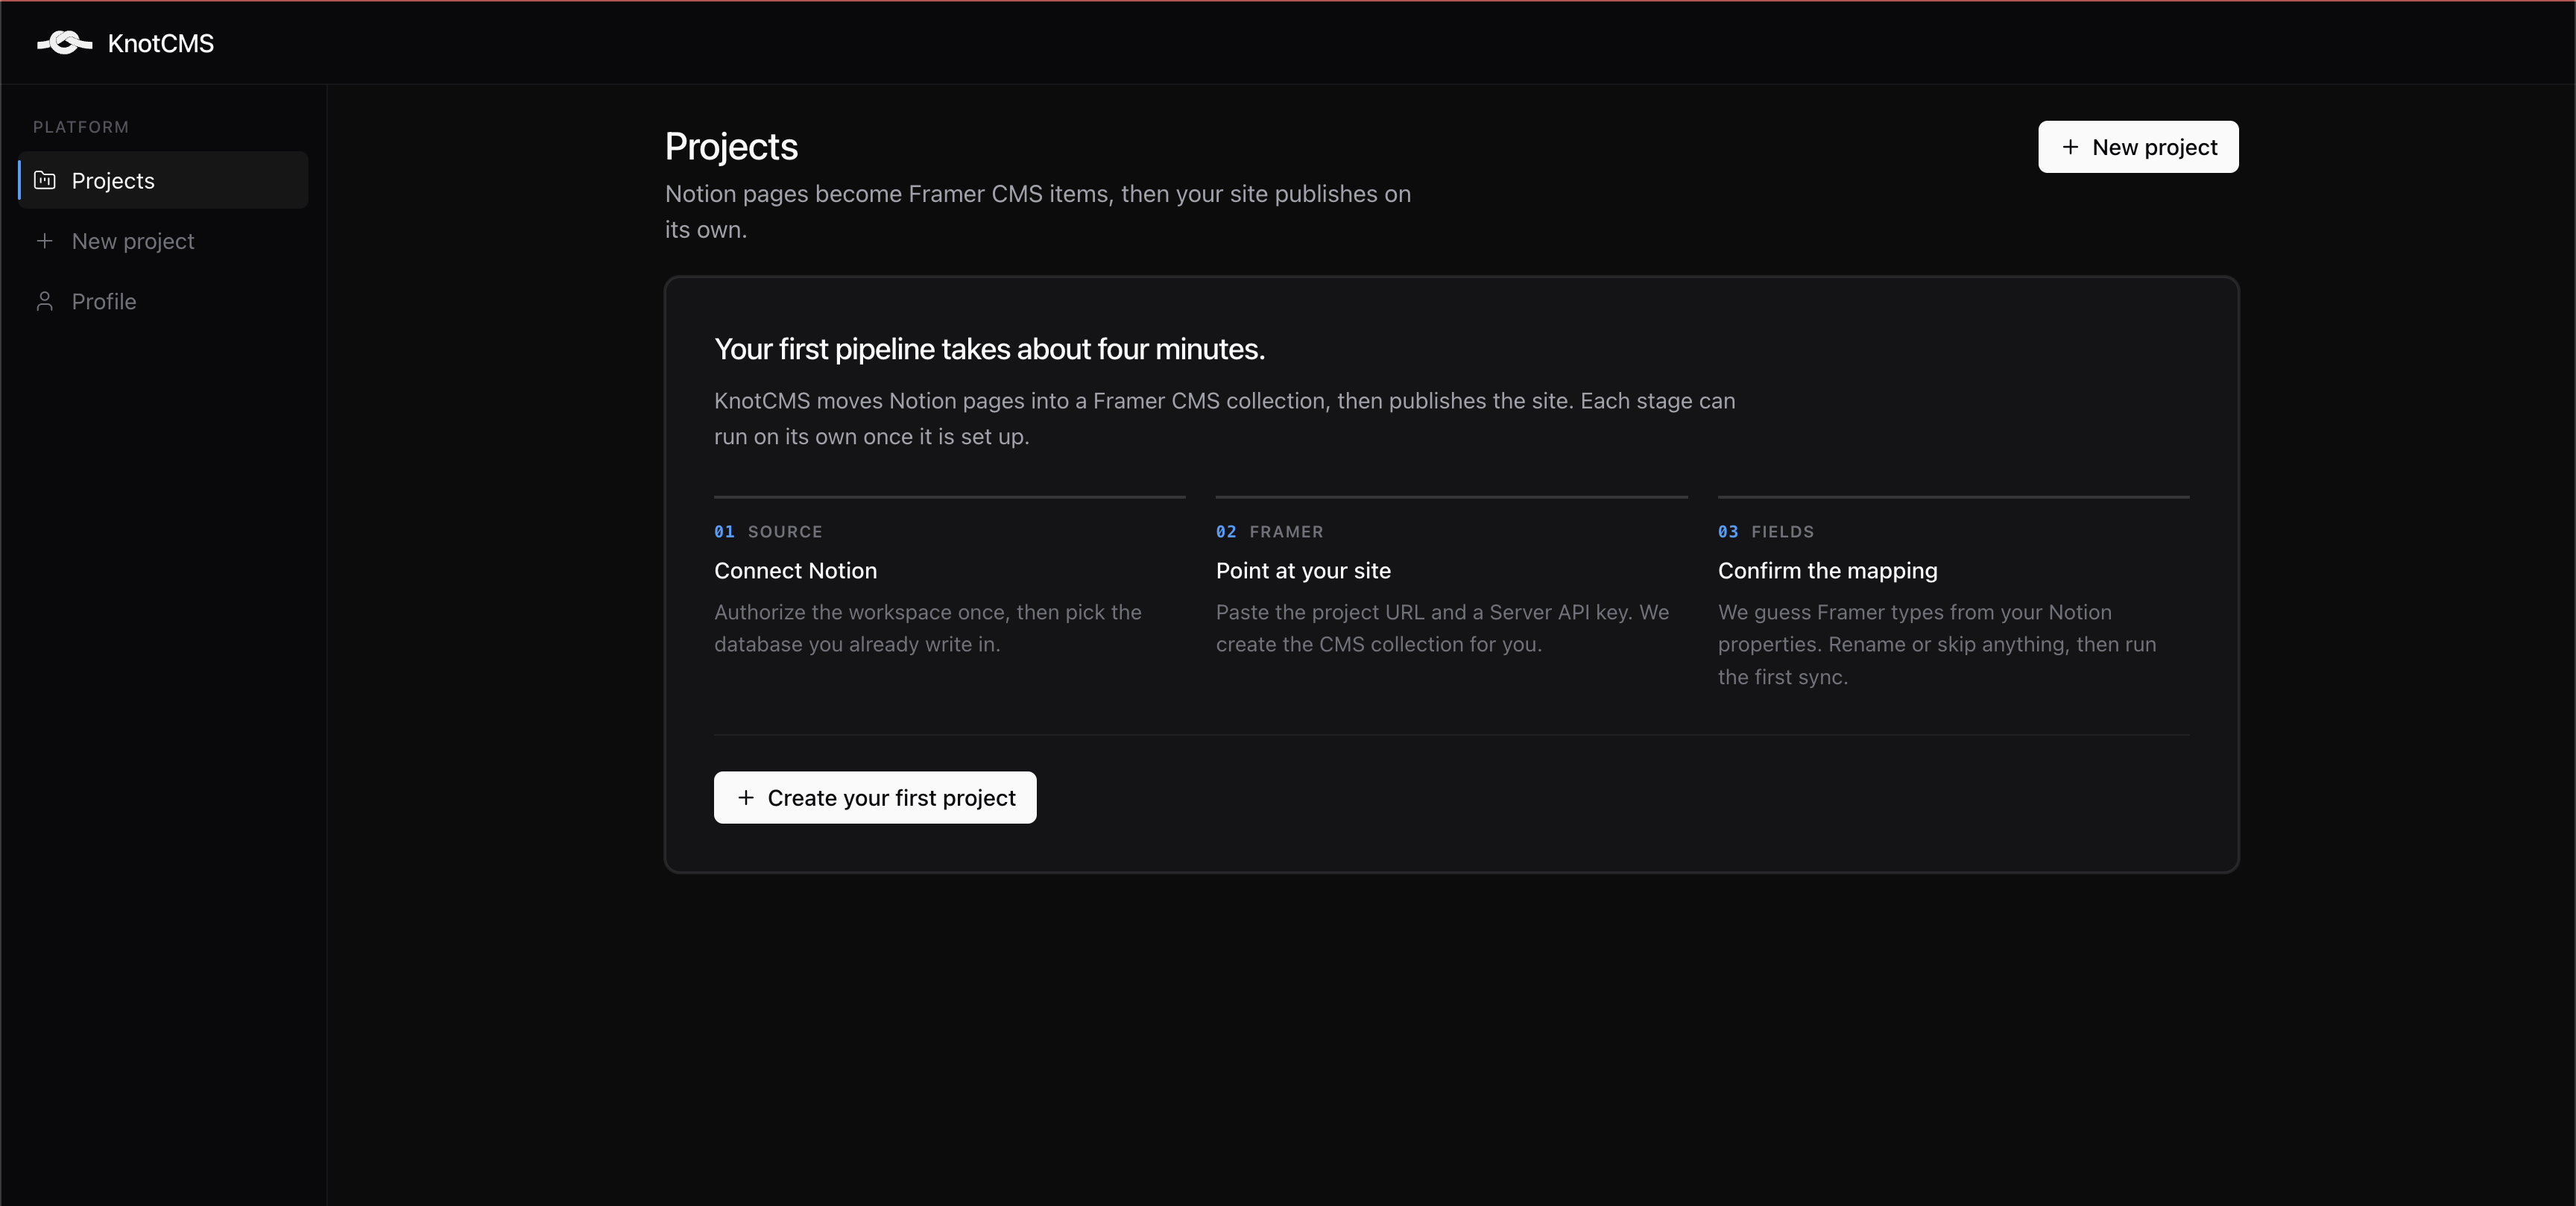
Section titled “Open a new project”Sign in at app.knotcms.com. On Projects, click Create your first project or + New project. Both open the same wizard.
1. Connect
Section titled “1. Connect”Link Notion and your Framer site on this screen. These connections are needed for all three setup paths.
Connect Notion
Section titled “Connect Notion”- Under Content source, click Connect on the Notion card.
- Complete Notion’s authorization flow in the workspace you want to use.
- If you already have a Notion database, use Select pages to grant access to that database, then click Allow access. If you are creating a new database from Framer, connect the workspace where it should be created.
- Return to the wizard. The card should say Notion connected.
Need help with the permission screen? See Connect Notion.
Enter your Framer credentials
Section titled “Enter your Framer credentials”- Open your project in the Framer editor and copy its URL from the browser address bar. Use the project URL, not your published website address.
- Paste it into Framer project URL.
- Paste the project’s Server API key into the field below it. Get an API key if you do not have one yet.
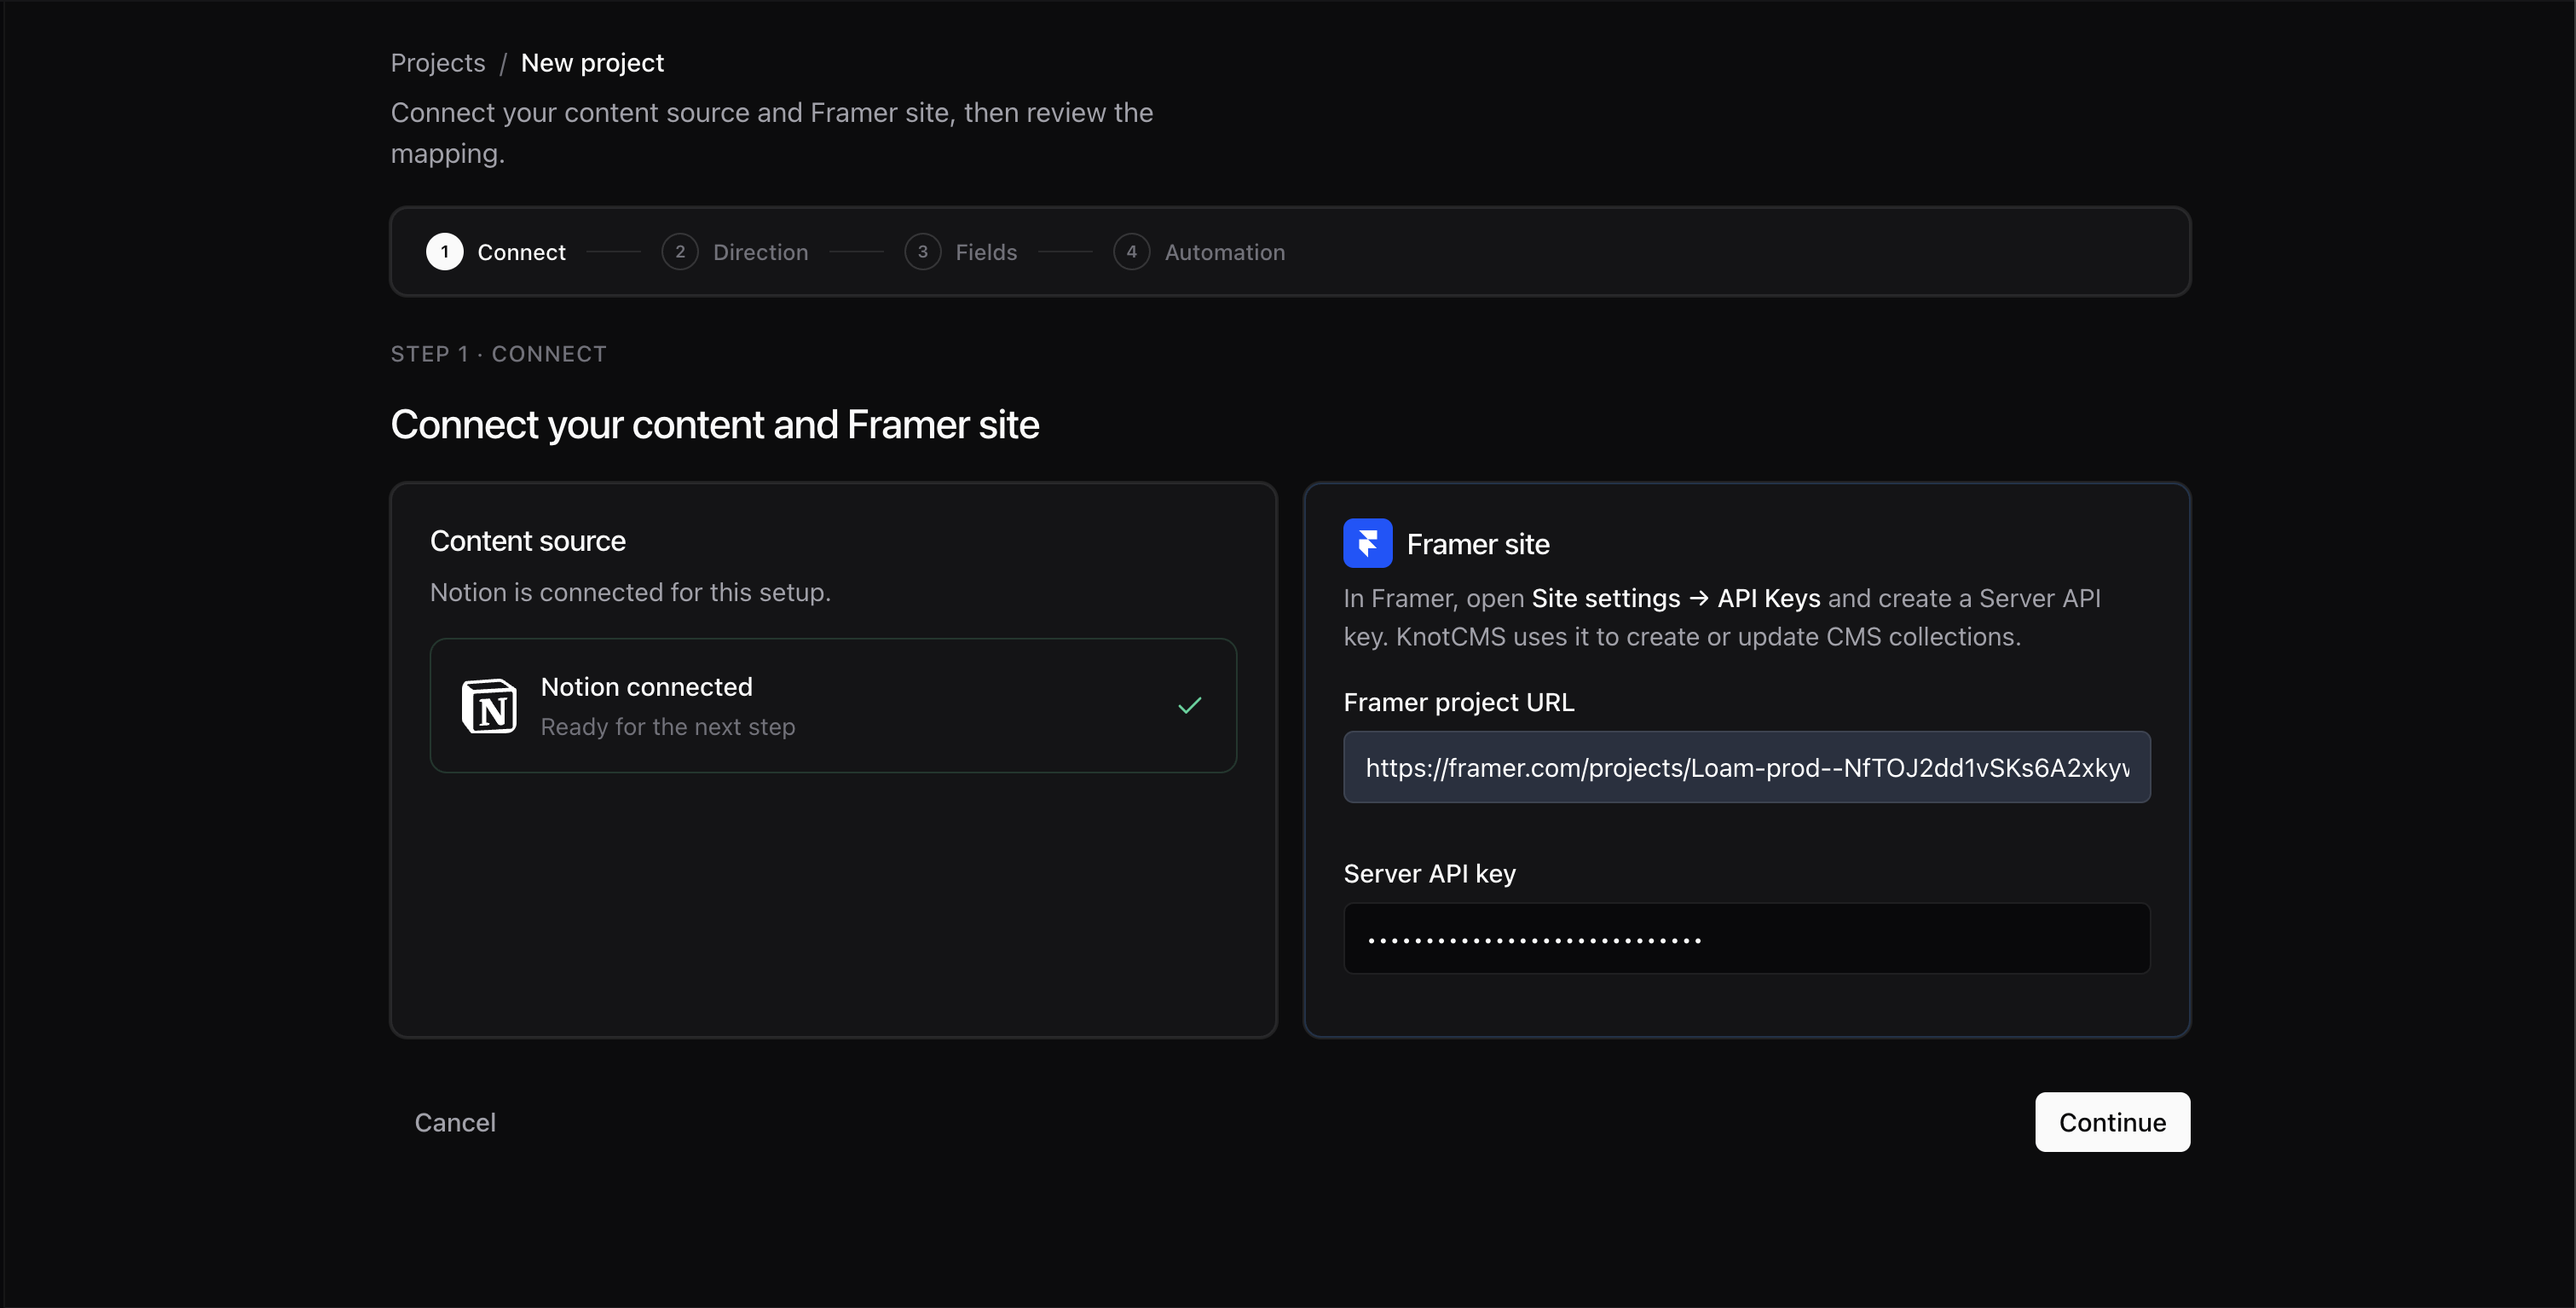
Click Continue. The button shows Verifying… while KnotCMS checks the Framer credentials. When the check succeeds, the wizard opens Direction.
If you cannot continue, check that Notion is connected and both Framer fields are filled. If verification fails, the API key must belong to the project whose URL you pasted.
2. Direction
Section titled “2. Direction”Choose the card that matches where your content lives. The cards appear in this order:
| Your starting point | Card to choose |
|---|---|
| Content is in Framer; you want to edit it in Notion | Create new Notion database using an existing Framer CMS collection |
| Both databases already exist | Connect existing databases |
| Content is in Notion; you need a Framer collection | Create a new Framer CMS collection and sync with existing Notion database |
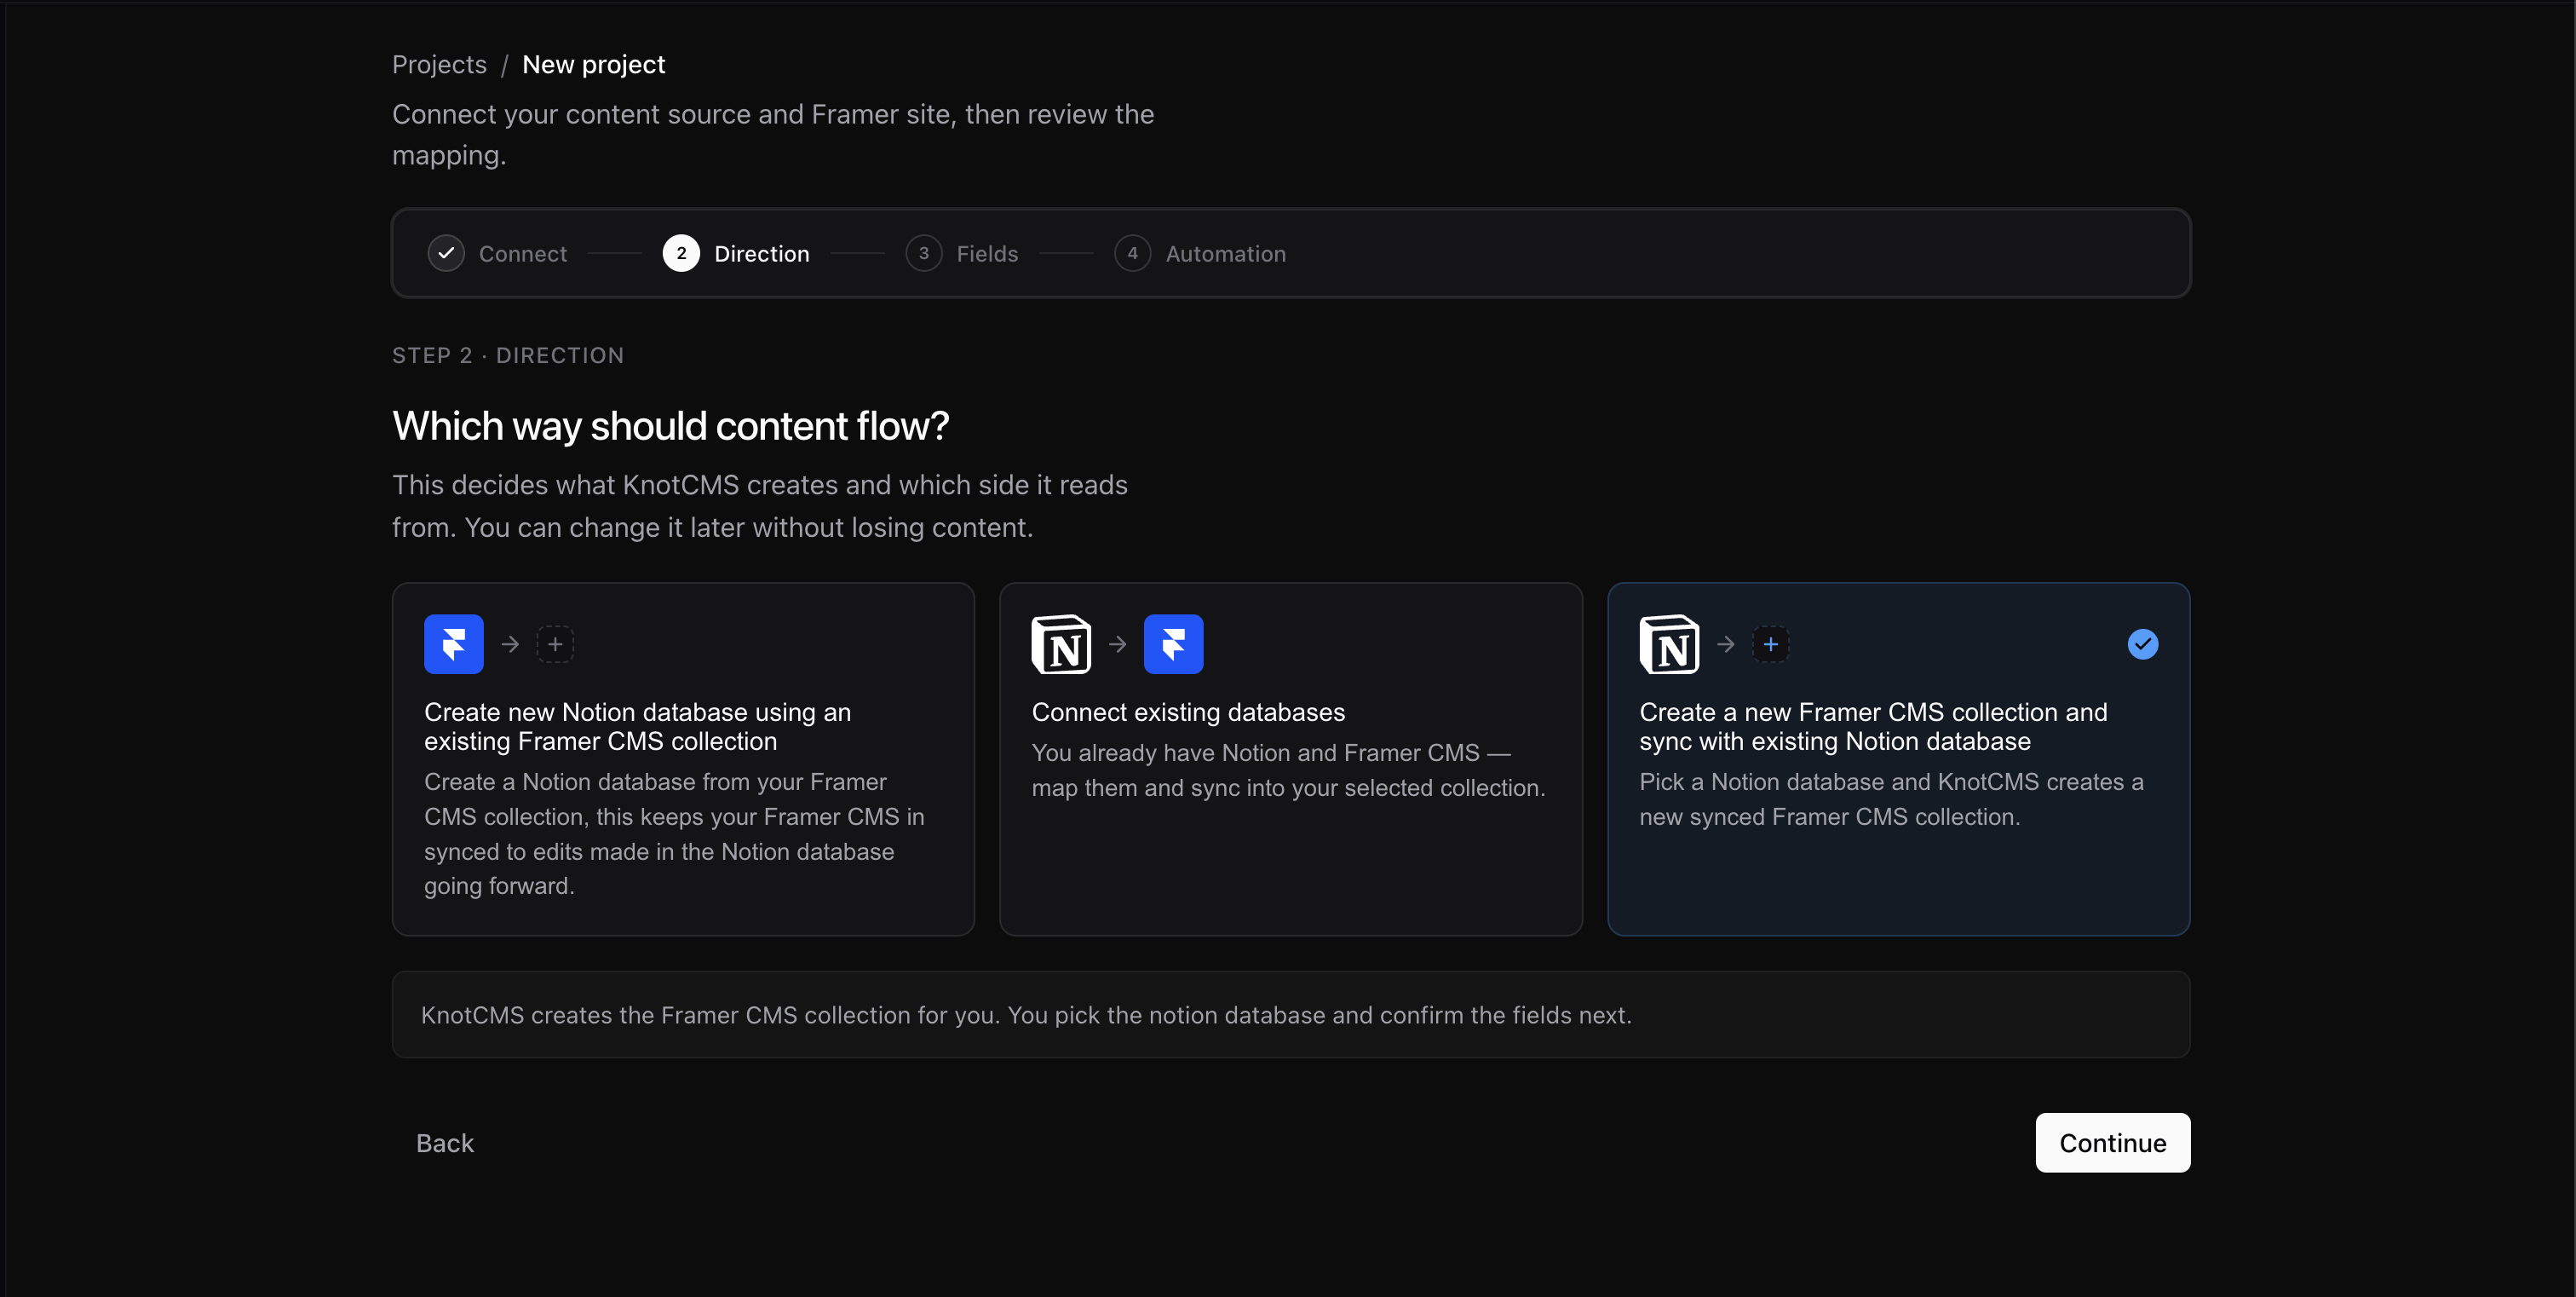
For either path that uses an existing Framer collection: select that collection under CMS collections on this same screen. Use Load collections or Reload collections if needed. You must select a collection before you can continue.
For a new Framer collection from Notion: there is no Framer collection to select. KnotCMS creates it for you.
Click Continue to open Fields.
3. Fields
Section titled “3. Fields”First, follow the tab that matches the direction you selected. Then review the field mapping below — that part is shared by all three paths.
You chose: Create new Notion database using an existing Framer CMS collection.
- In Create Notion database, check the name of the Framer collection you selected in Direction.
- Set Rows to import from Framer. Use Select all to import the published rows within your plan’s limit, or enter 0 to create only the database structure. Draft rows are excluded.
- Review any warnings about fields that cannot be imported or rows you are leaving out.
- Click Create Notion database and wait for the mapping screen.
KnotCMS creates a page and database in your connected Notion workspace. Open it in Notion to check the imported columns and rows.
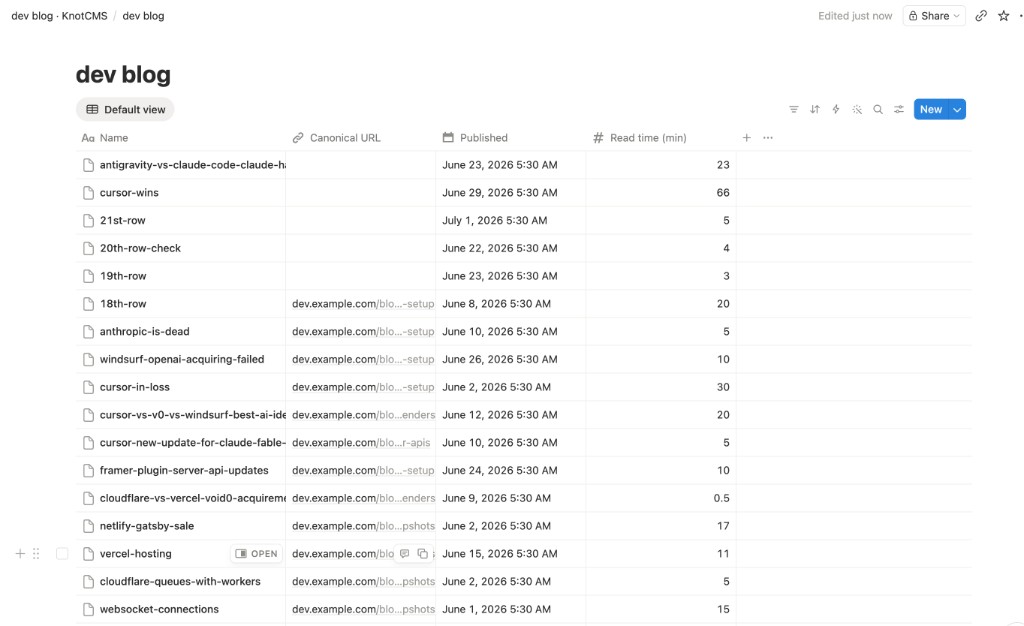
The new Notion database normally syncs back to the Framer collection you selected. If that collection belongs to another plugin, KnotCMS creates a separate editable Framer collection; the wizard explains this before the import.
Next: review the shared field mapping below.
You chose: Connect existing databases.
- Under Choose Notion database, select the database that should supply content to the Framer collection you chose in Direction.
- Review the shared field mapping below. Match the names on the Framer CMS side to the columns you want to update.
- If Where should Notion sync? appears below the mapping, choose the destination:
- Update “your collection” writes into the existing Framer collection.
- Create “your collection · KnotCMS” creates a separate collection, using the selected one as a template.
If the existing collection belongs to another plugin, KnotCMS uses a separate editable collection instead of offering an in-place update.
Next: review the shared field mapping below and confirm the destination before continuing.
You chose: Create a new Framer CMS collection and sync with existing Notion database.
- Under Choose Notion database, select the database you granted access to during Connect.
- Wait for its properties to appear in the mapping screen.
- Review the shared field mapping below. KnotCMS will create a Framer collection using these fields when you finish setup.
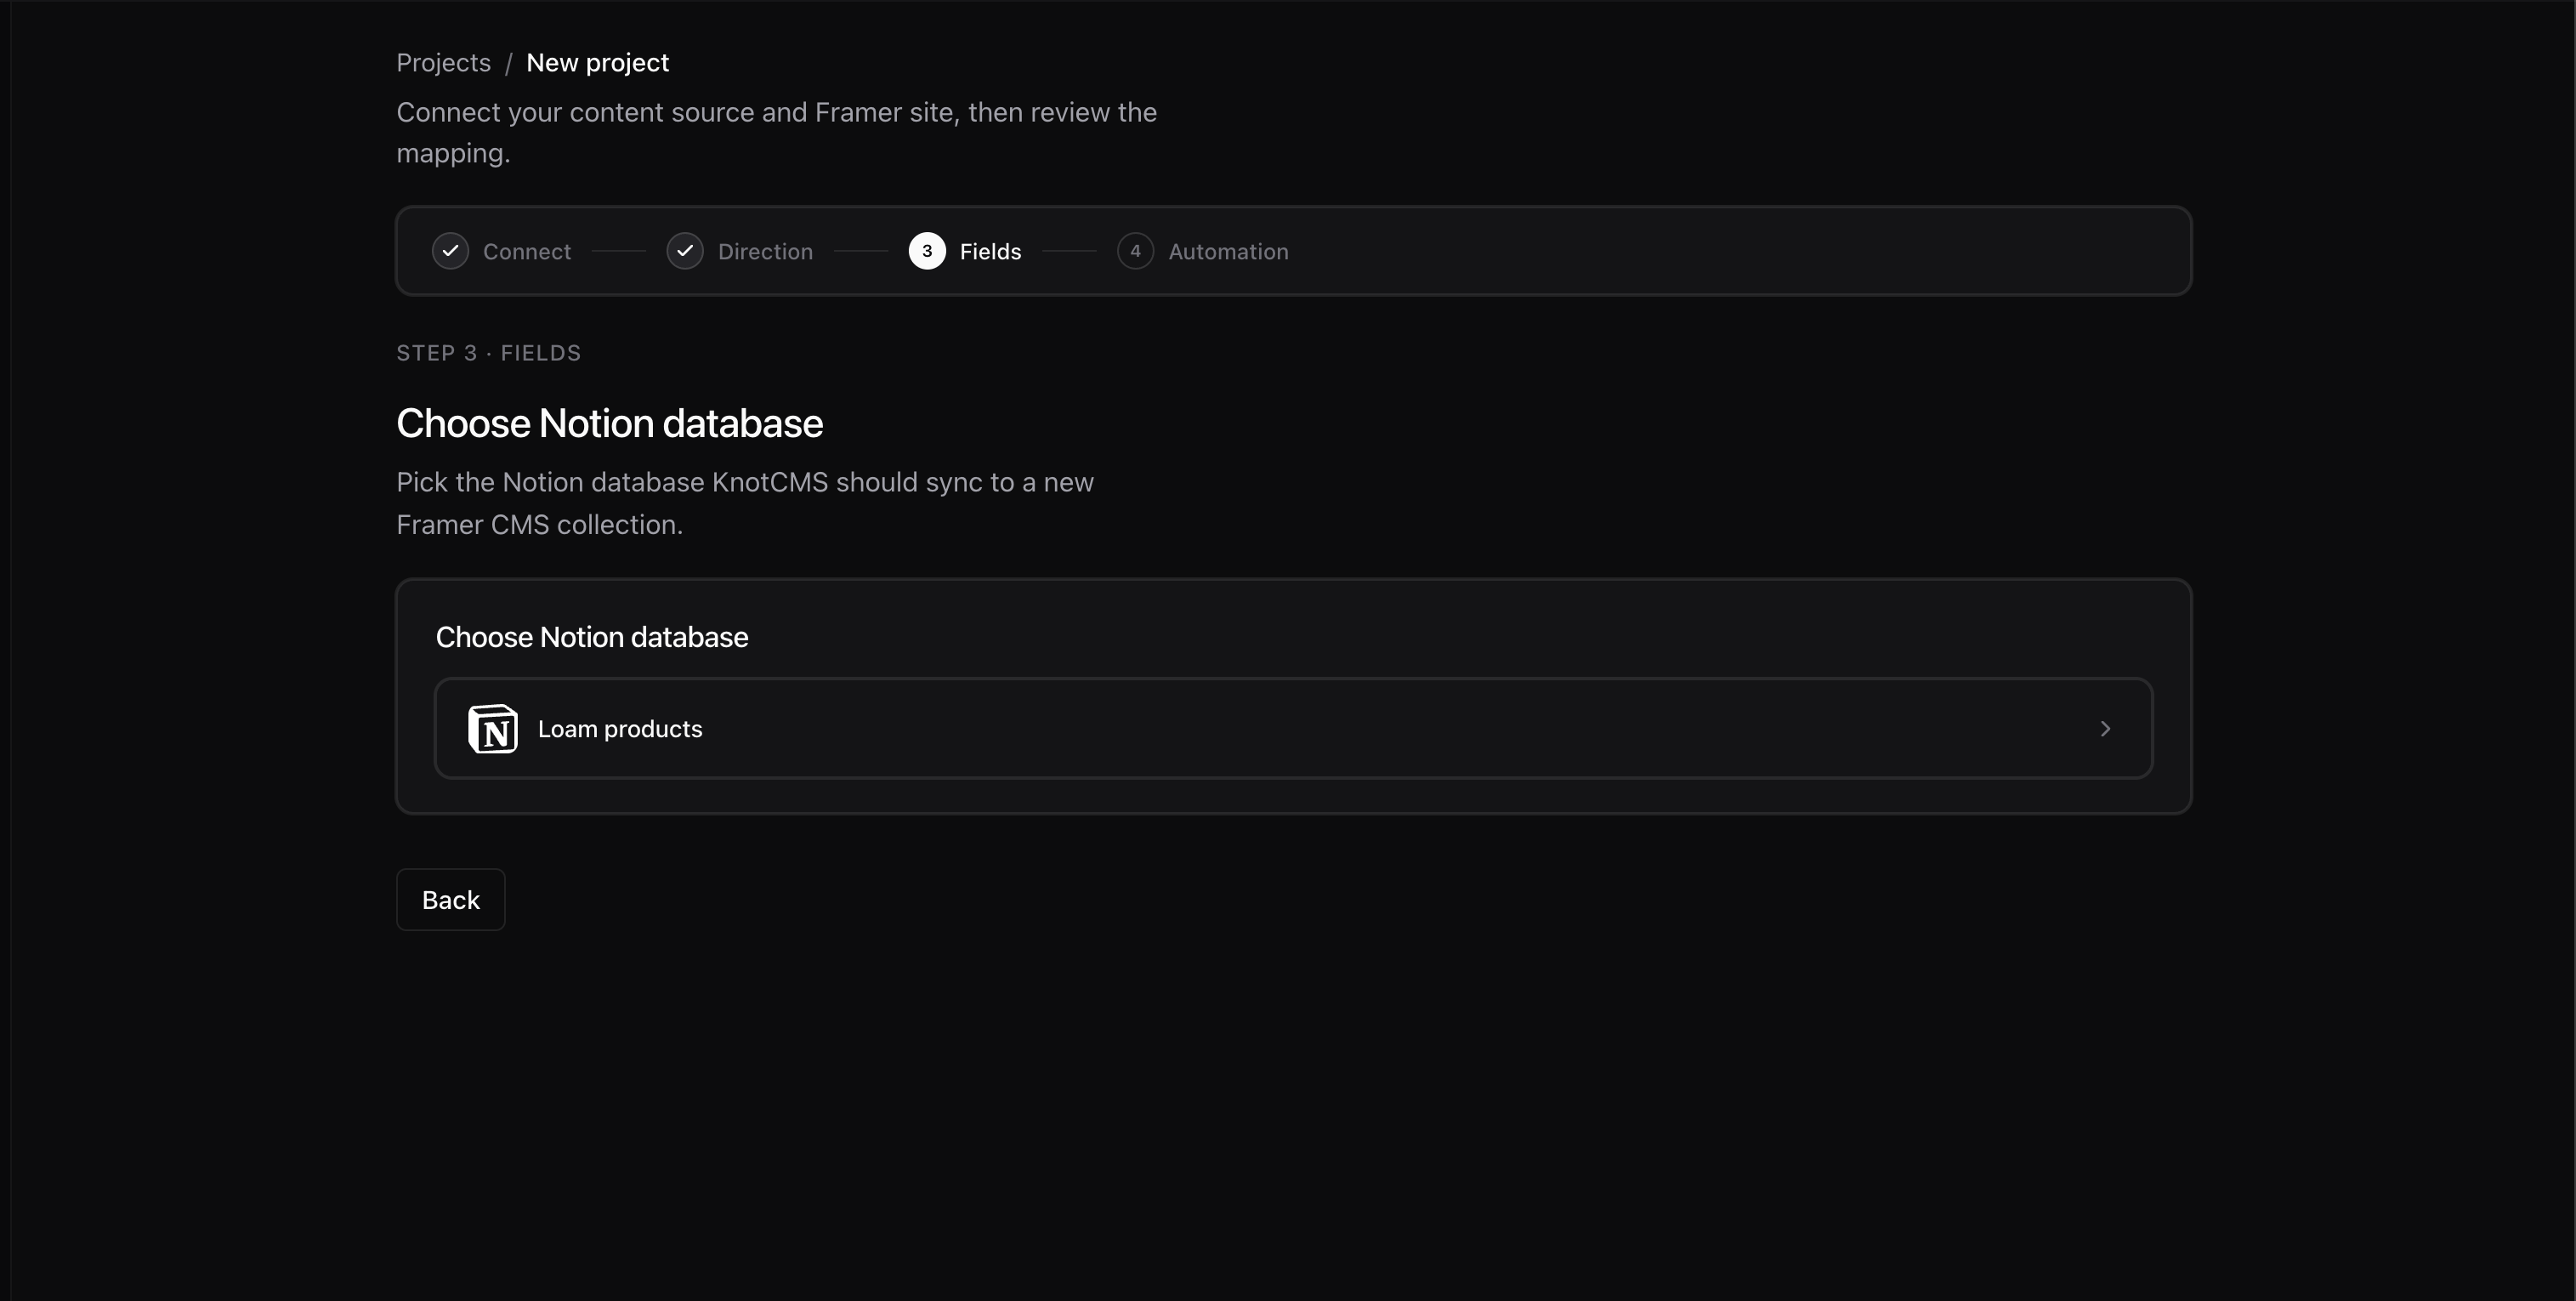
Next: review the shared field mapping below.
If an existing Notion database is missing from the list, check its connection permissions.
Review the field mapping
Section titled “Review the field mapping”Each row pairs a Notion property on the left with a Framer CMS field on the right.
- Choose the Slug field. A slug is the part of a CMS page’s URL that identifies the item, such as
ceramic-cup. Pick a property with a distinct value for each row; the title/name property is a useful starting point. - Choose which fields sync. Leave the fields you want checked. At least one must stay enabled.
- Check the Framer CMS names and types. These become the destination columns. For an existing collection, check that they match the columns you intend to update.
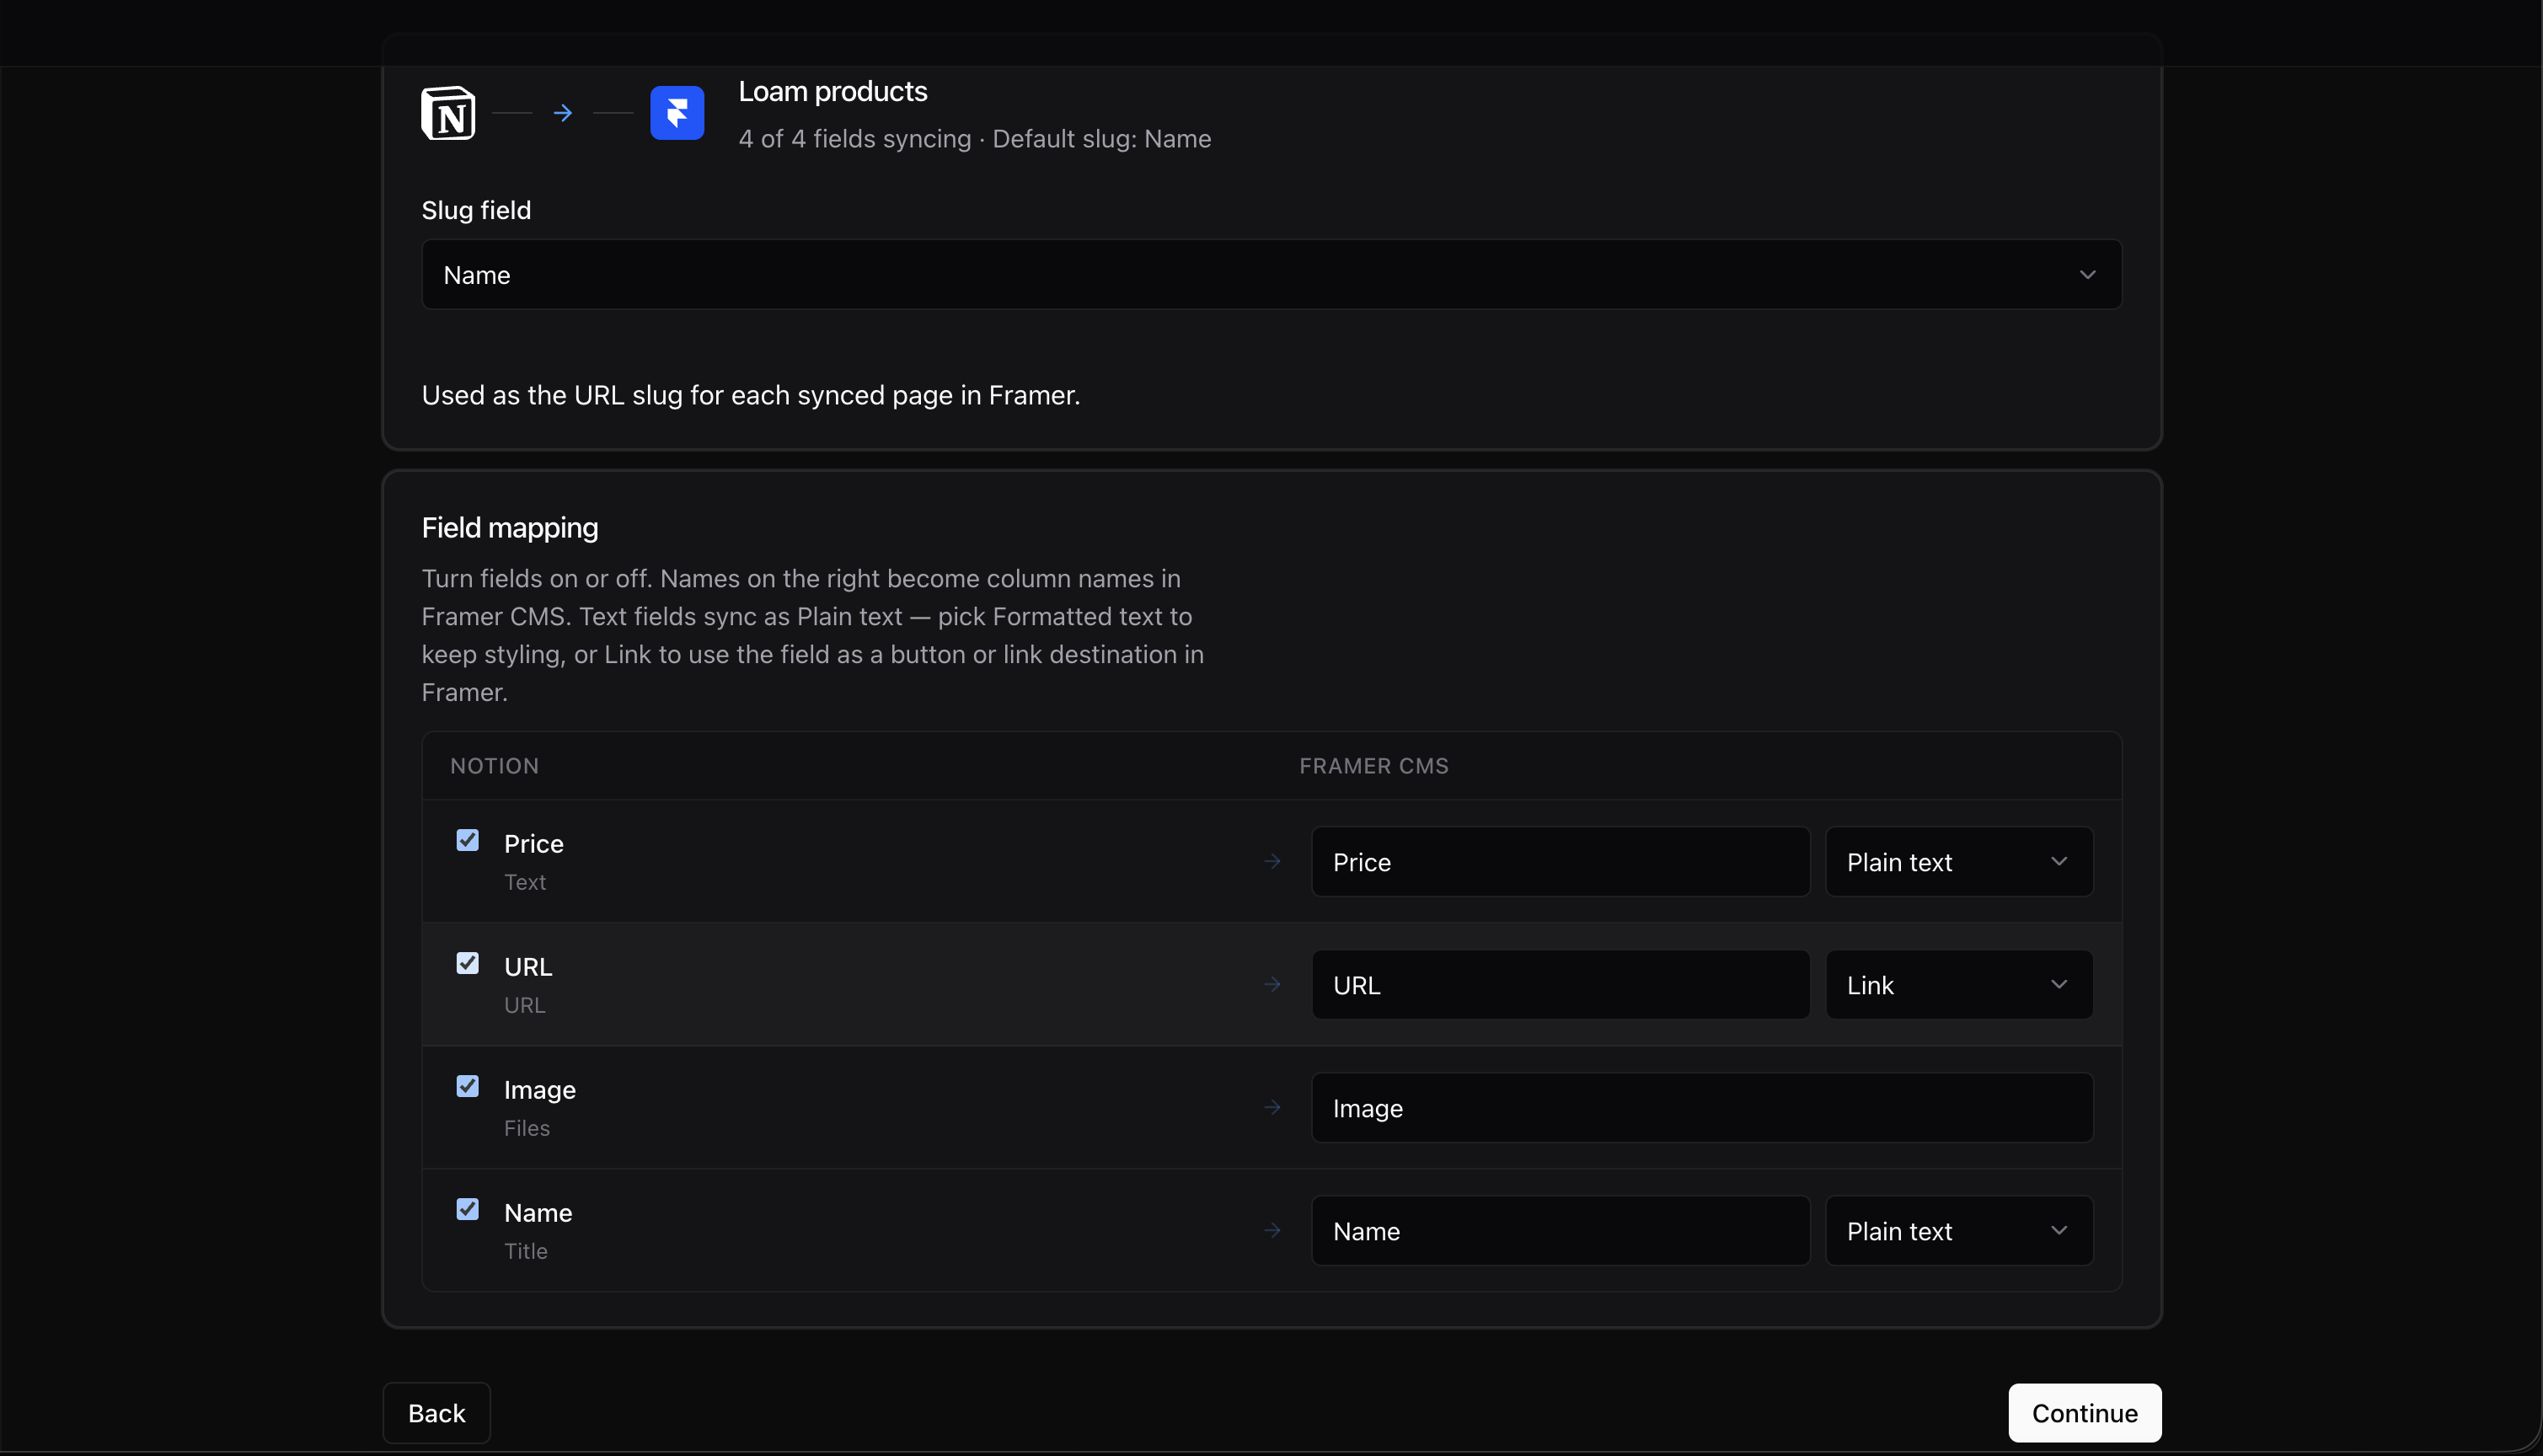
Text fields default to Plain text. Use Link for a field that supplies a button or link destination. See Field mapping for type choices and updating existing columns.
Check any sync destination shown below the mapping, then click Continue to open Automation.
4. Automation
Section titled “4. Automation”Choose which actions should run automatically. You can change both switches later in the project’s Settings tab.
| Control | Turn it on to… | If you leave it off |
|---|---|---|
| When Notion changes, sync to Framer CMS | Check Notion every minute and sync changes, using your plan’s sync allowance | Run future syncs with Sync now |
| After each sync, publish the site | Publish after a successful sync; requires a paid plan | Publish from Framer yourself when ready |
If you enable auto-publish, choose Live site to update your public website or Preview only to publish a preview.
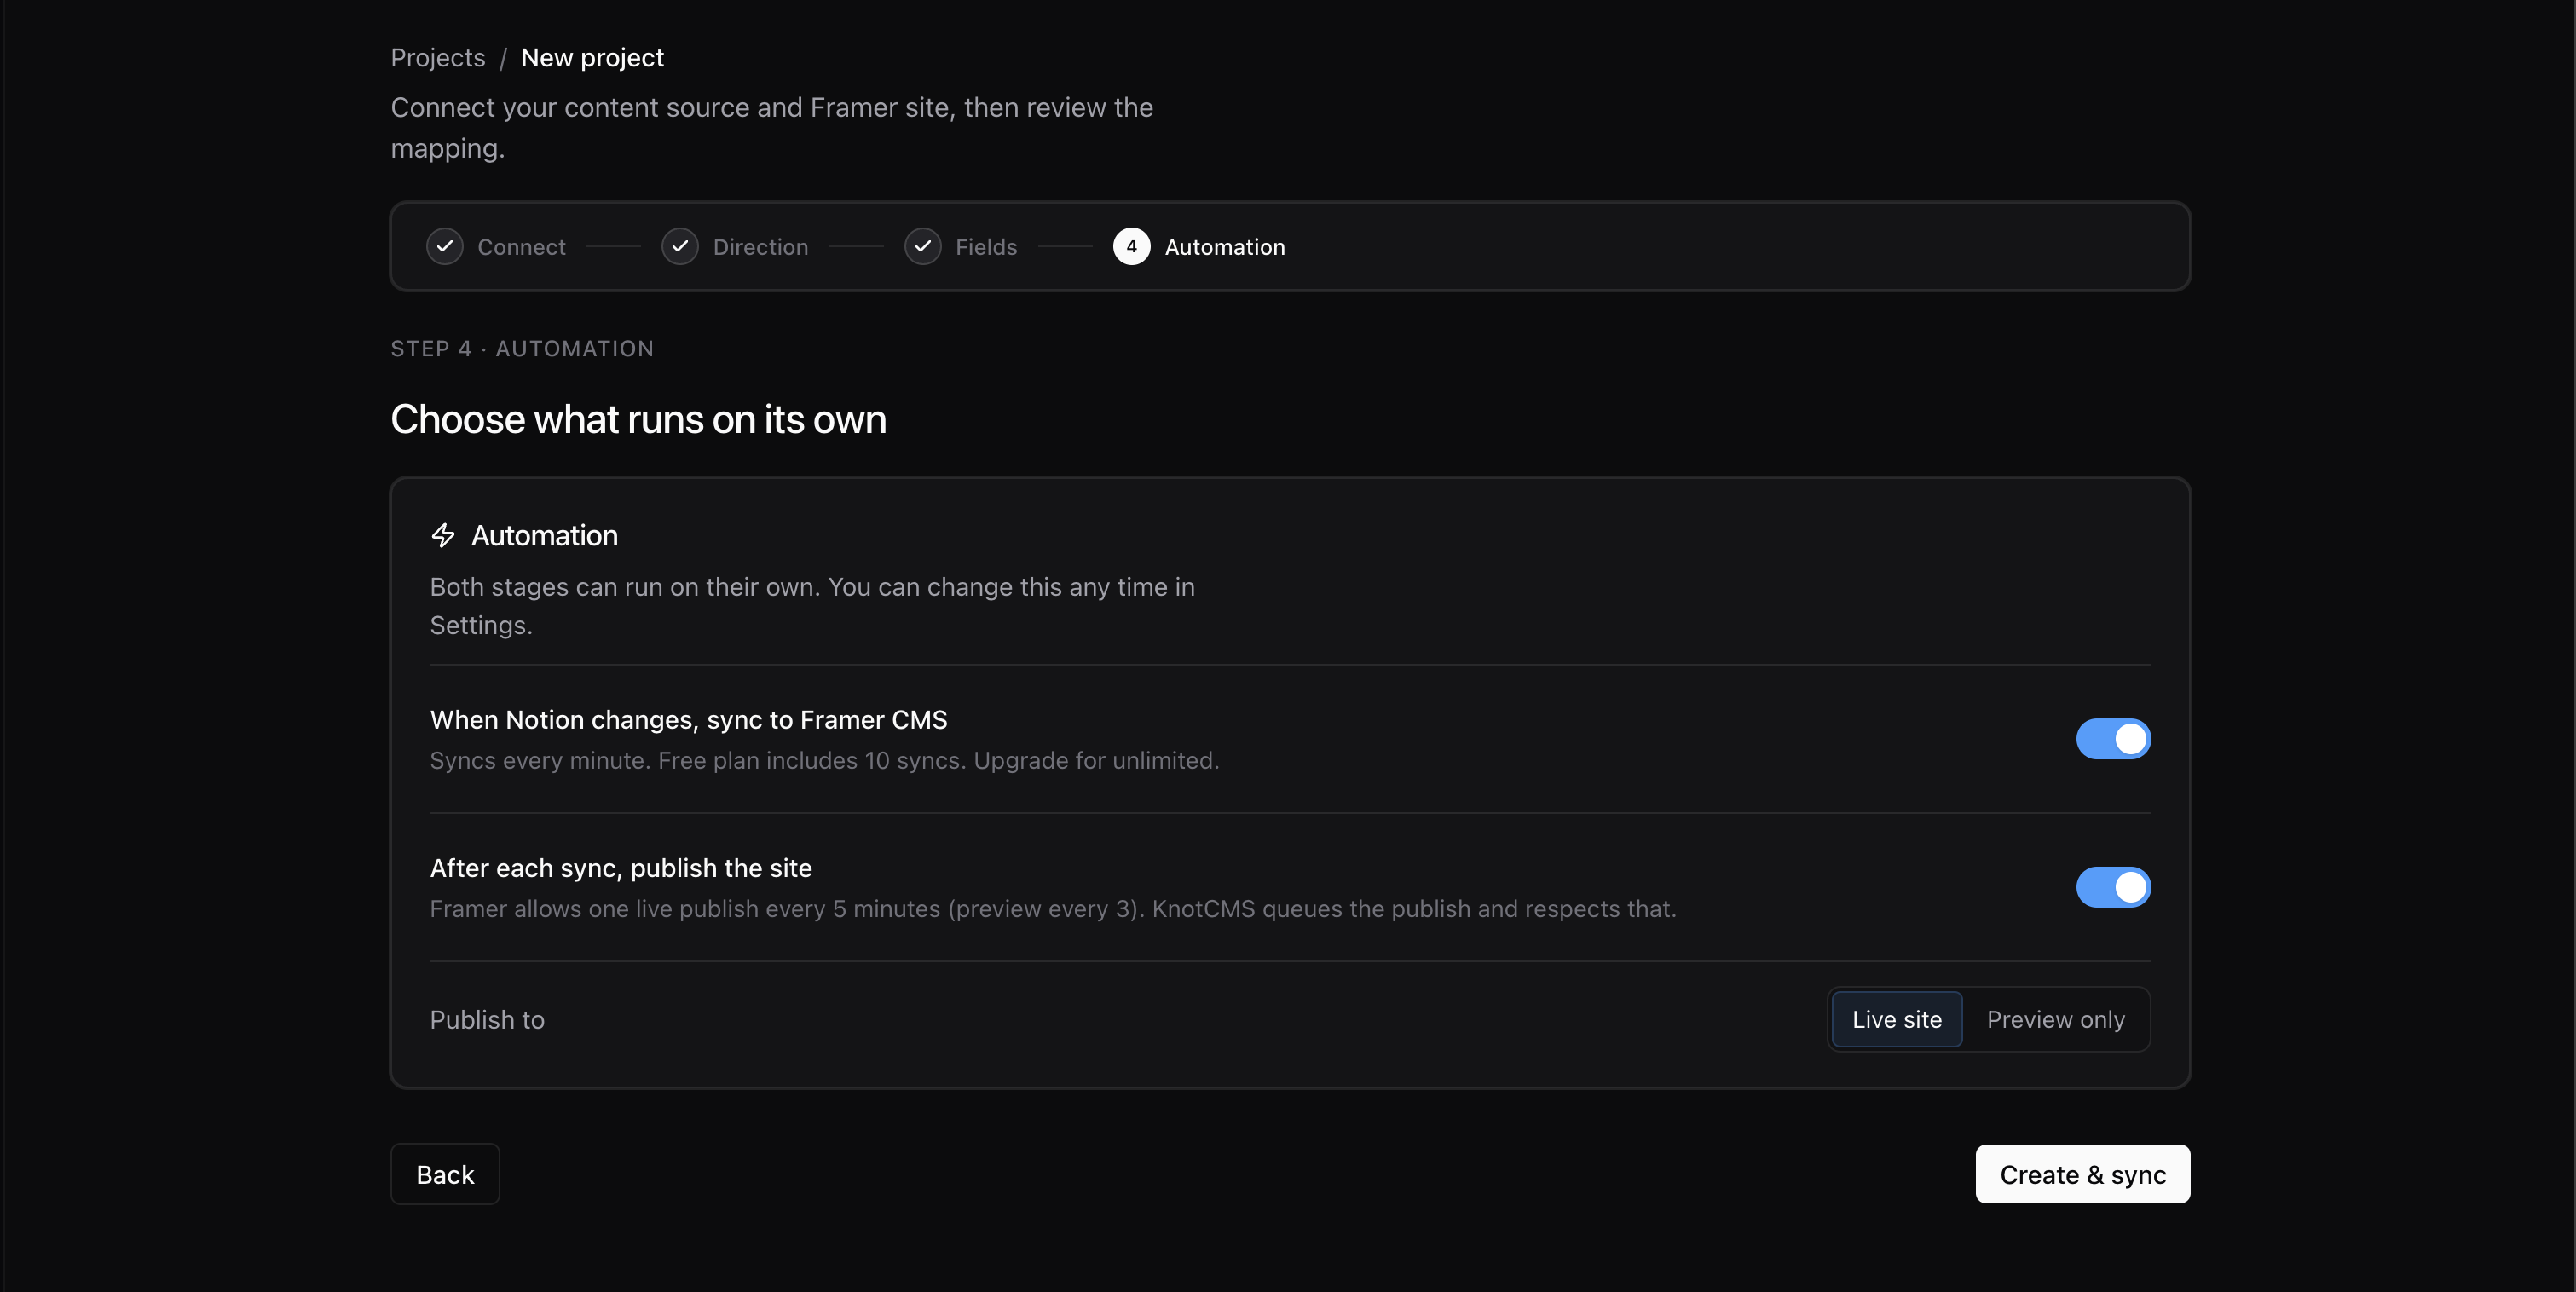
Auto-sync needs no extra setup in Notion. With auto-publish, publishes may wait for the cooldown: 5 minutes between live publishes or 3 minutes between previews.
Click Create & sync once. KnotCMS creates your project and starts the first sync, even if both automation switches are off.
Check your first sync
Section titled “Check your first sync”The project page opens on Overview. Read the two stages separately:
- Sync confirms that Notion content reached Framer CMS.
- Publish confirms what happened to the website or preview, if you enabled auto-publish.
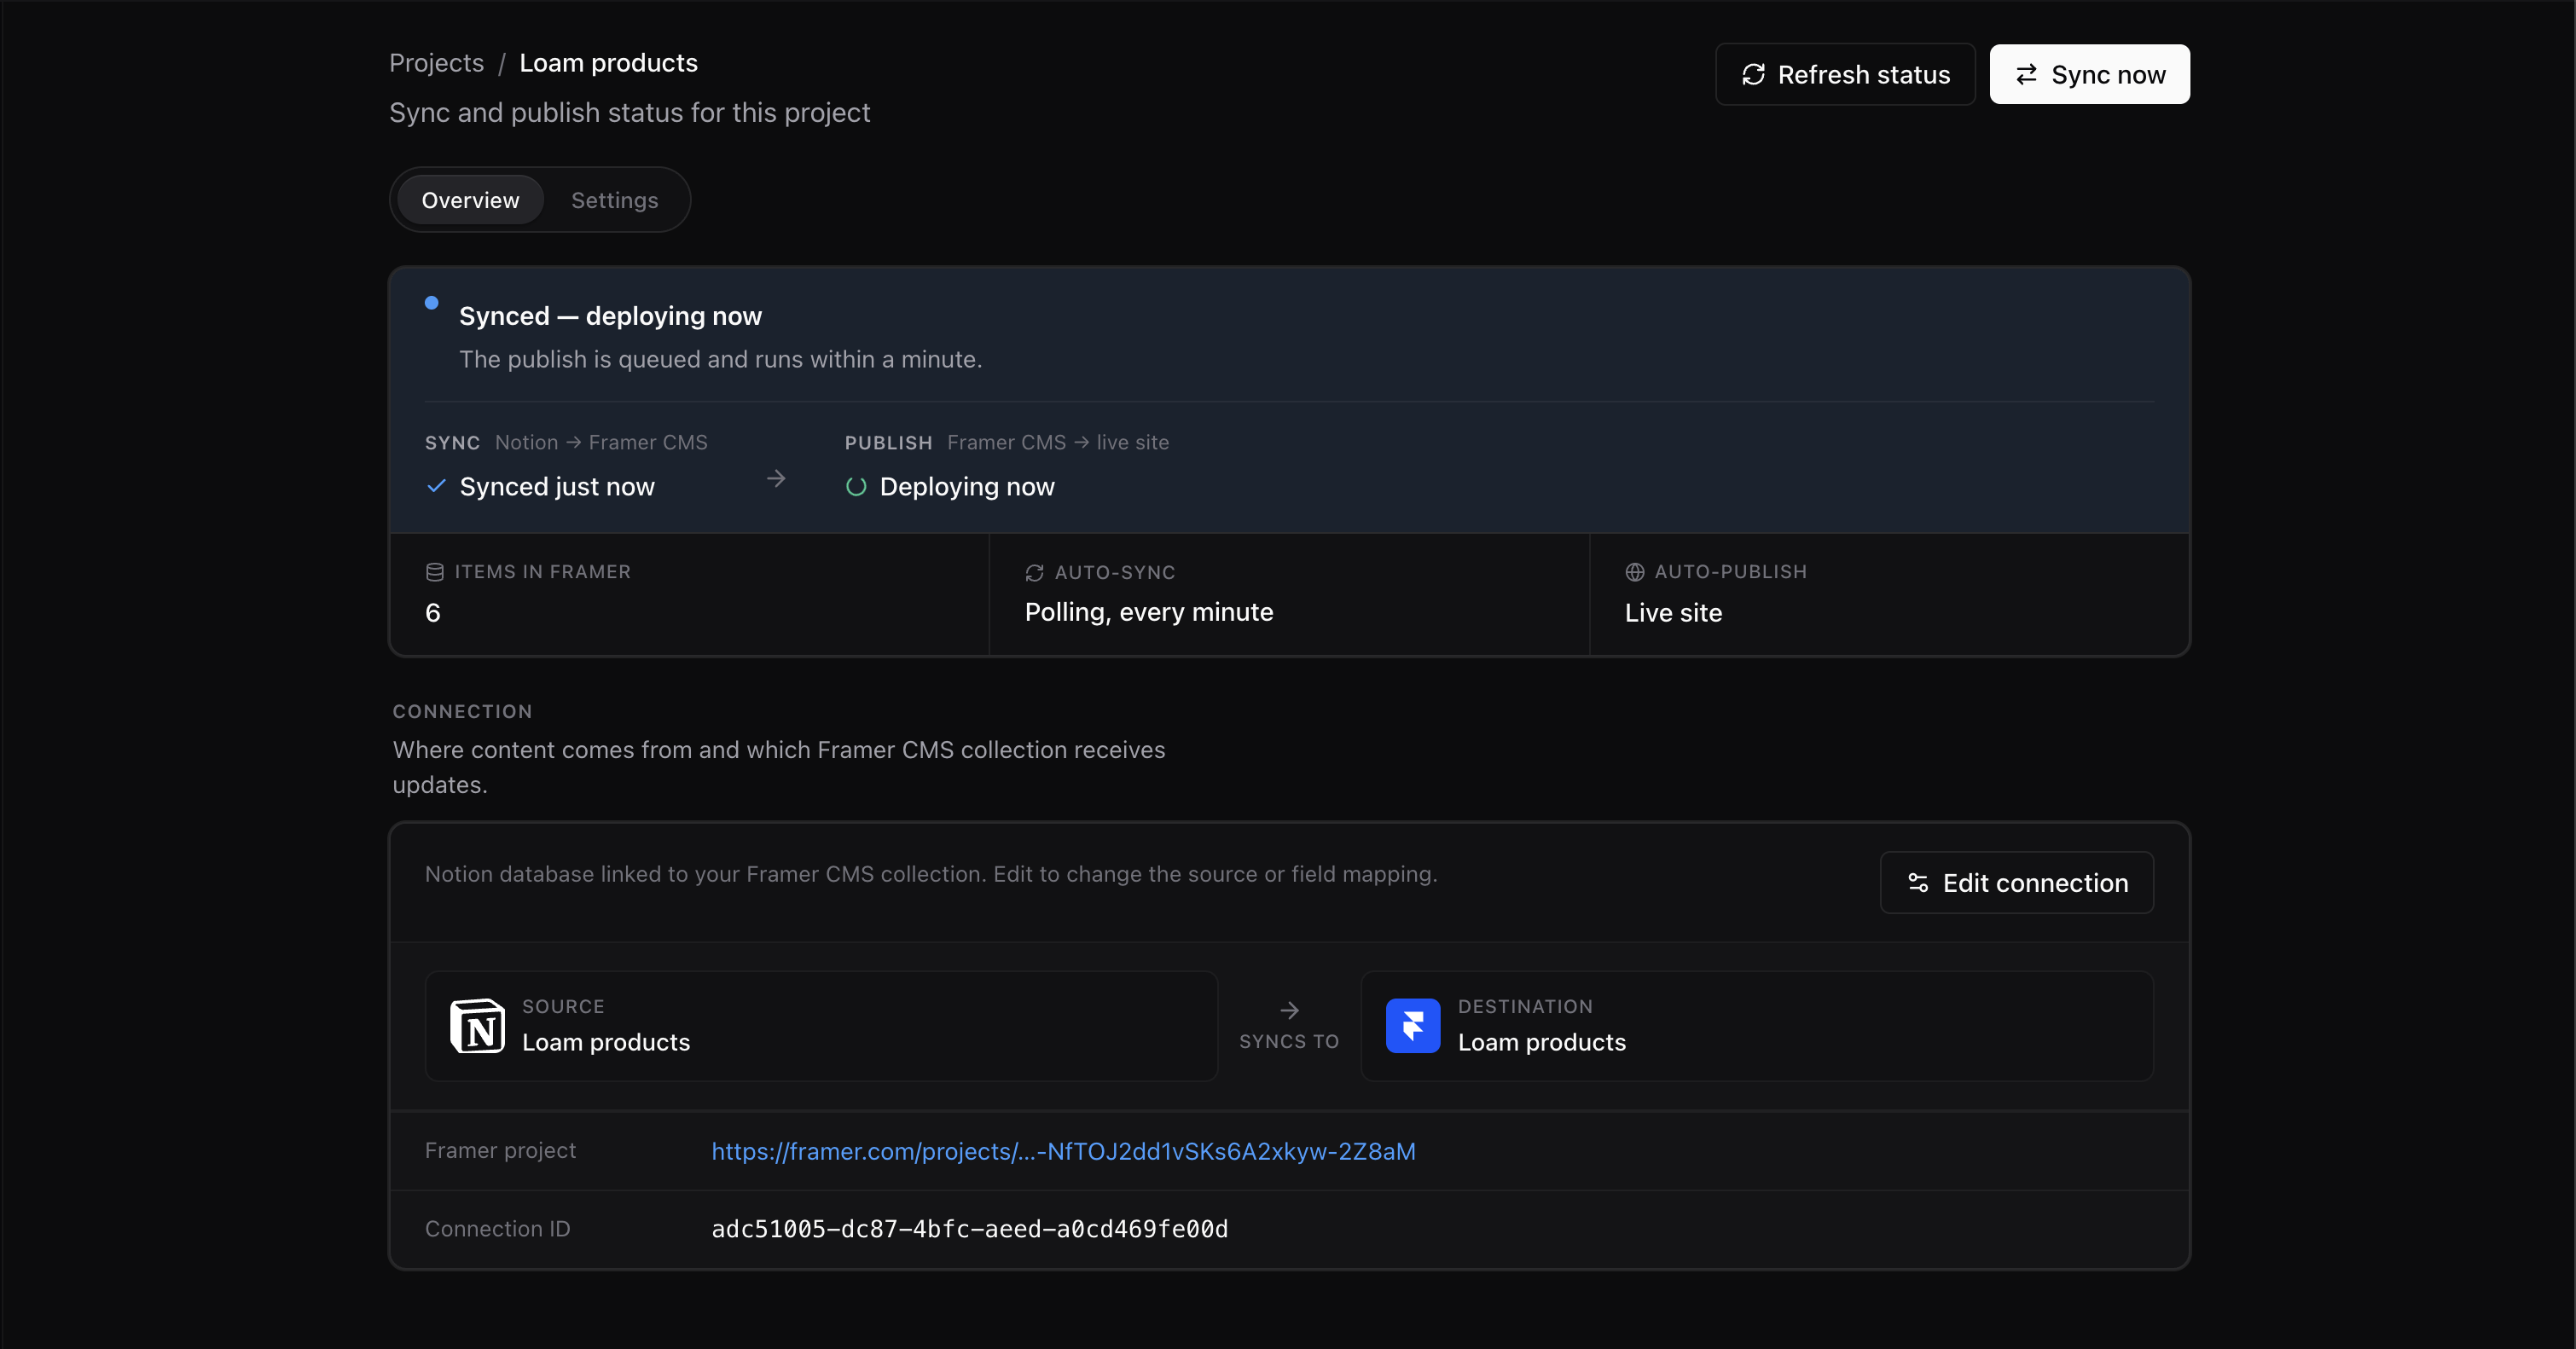
Confirm the result:
- Sync shows Synced with a recent time.
- Items in Framer shows the expected item count, allowing for your import selection and plan’s row limit.
- Open the destination collection in Framer CMS and check a title and another mapped field.
- If you enabled Live site auto-publish, wait for Deployed, then check your website. A cooldown can delay publishing without delaying CMS sync.
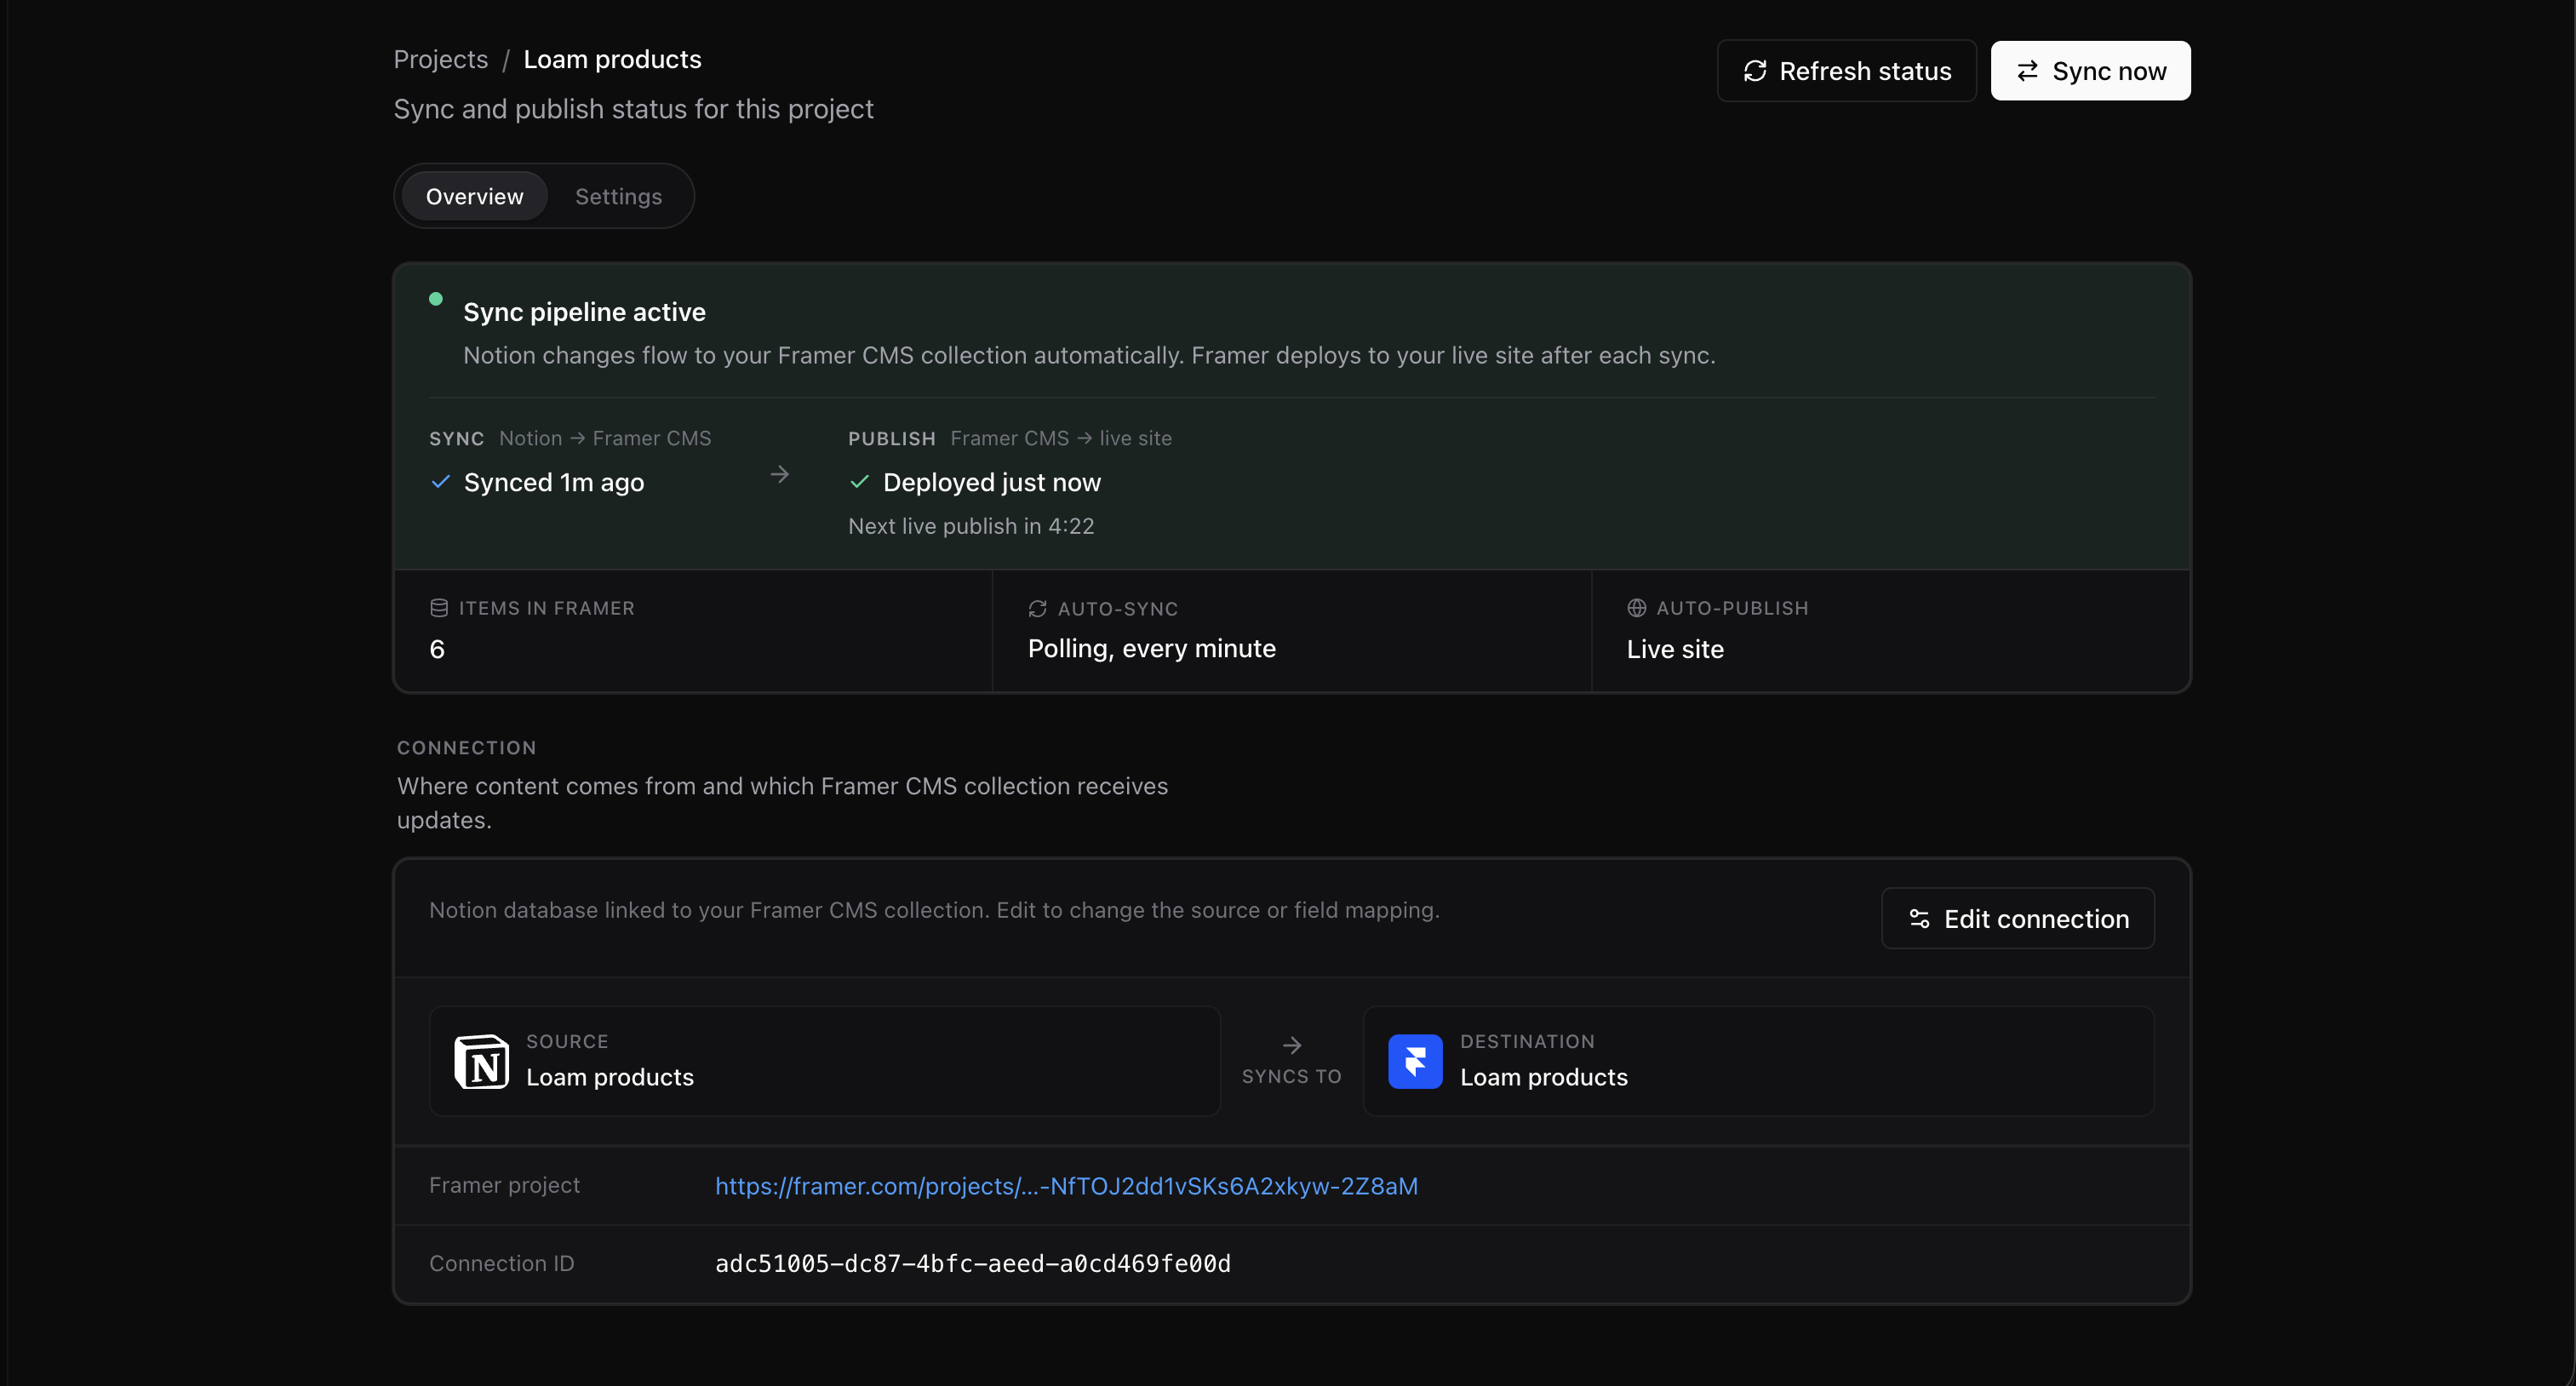
With auto-sync on, add or edit a database property in Notion and allow up to two minutes for the change to reach Framer CMS. With auto-sync off, click Sync now. Refresh status only reloads the status shown on this page.
Next steps
Section titled “Next steps”- Auto-sync — timing, free sync allowance, and paused states.
- Auto-publish — live versus preview publishing and cooldowns.
- Reconfigure a project — change the connection or mapping later.
- Troubleshooting — find a fix if sync, publishing, or a field looks wrong.